 +86-13989680588
 graylin@hongjiavalve.com
Submit feedback
Tips for Installing a Threaded Stop Valve Without Leakage
Author: Hongjia
Date: Jun 19, 2026
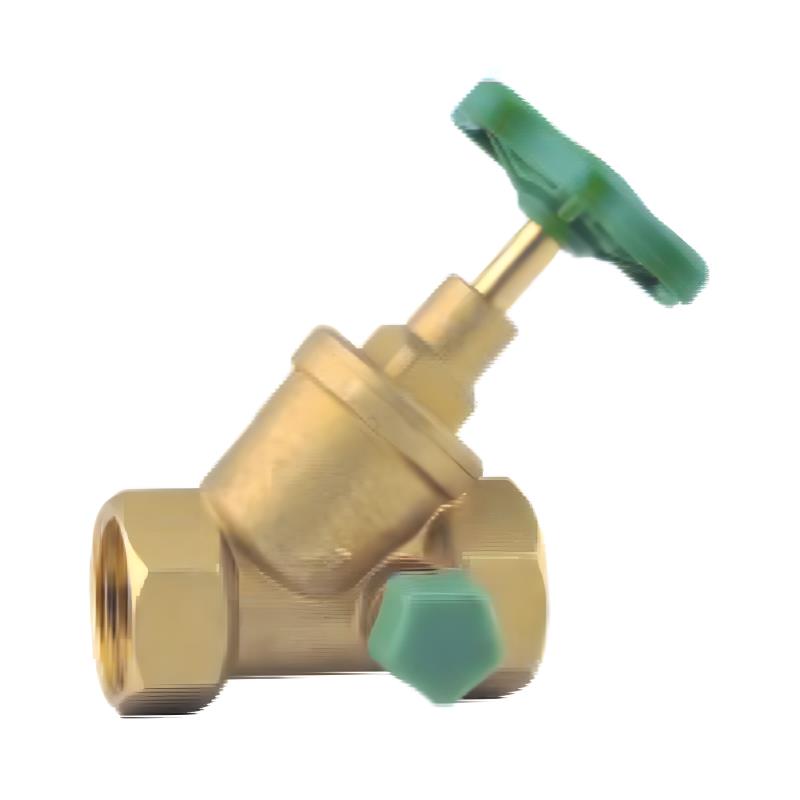
A Threaded Stop Valve connects to a pipe through matching threads. Water flows through the valve. The threads hold the valve in place. The seal prevents water from escaping around the threads. A leak at the threads defeats the purpose of the valve.
The leak happens when the seal fails. Water finds a path through the tiny gaps between the male and female threads. The gaps look invisible to the eye, but water molecules pass through easily. The sealant fills those gaps. A poorly applied sealant leaves gaps open.
Over tightening creates a different problem. The metal threads deform under excessive pressure. The deformed threads lose their shape. The sealant cannot fill a deformed gap because the gap changes shape as the valve moves.
Under tightening leaves the valve loose. The threads do not engage fully. A loose valve wiggles when touched. The movement breaks the sealant seal. Water seeps through the gaps.
Contamination on the threads also causes leaks. Dirt, oil, or old sealant on the threads prevents the new sealant from adhering. The sealant peels away when the valve tightens. A clean thread surface holds sealant properly.
| Leak Cause | What Happens | How to Prevent |
|---|---|---|
| Insufficient sealant | Gaps remain between threads | Apply full coverage sealant |
| Over tightening | Threads deform | Tighten to correct feel |
| Under tightening | Valve moves | Tighten fully with wrench |
| Dirty threads | Sealant does not stick | Clean threads before sealing |
| Cross threading | Threads damaged | Start threading by hand |
| Wrong sealant type | Sealant washes away | Use pipe thread compound or tape |
A person who understands these causes avoids them during installation. The preparation takes time but saves a later repair.
What Tools Prepare the Pipe for a Threaded Connection
The pipe end needs preparation before the valve goes on. A pipe cutter or hacksaw cuts the pipe to length. The cut must be square. An angled cut leaves gaps between the pipe and the valve.
A reamer removes burrs from the cut end. A burr is a small piece of metal left from cutting. The burr catches on the valve threads. The burr prevents the valve from seating fully. The reamer cleans the burr away.
The threads on the pipe need cleaning. A wire brush removes dirt and old sealant from used pipes. New pipes have oil from the manufacturing process. A clean rag with solvent wipes away the oil.
The valve threads also need checking. A visual inspection shows any damage. A damaged thread on a new valve means the valve should go back to the store. Installing a damaged valve leads to leaks.
A person working with a Threaded Stop Valve gathers tools before starting. Two pipe wrenches work for tightening. One wrench holds the pipe. The other wrench turns the valve. The second wrench prevents the pipe from turning inside the wall.
The workspace needs lighting. A person working in a dark cabinet cannot see the threads clearly. A headlamp or work light lights the work area. The person sees the thread engagement and checks for cross threading.
How Thread Sealant Works on the Valve Threads
Thread sealant fills the gaps between male and female threads. The sealant material sits in the grooves of the threads. When the valve tightens, the sealant compresses. The compression creates a watertight barrier.
Pipe thread tape is a common sealant. The tape comes in a roll. The person wraps the tape around the male threads. The tape fills the thread grooves. The tape also lubricates the threads during tightening.
Pipe dope is a liquid or paste sealant. A brush or applicator spreads the dope over the threads. The dope flows into the thread grooves. The dope cures over time into a solid seal.
The sealant does not hold the valve in place. The threads hold the valve. The sealant only stops water from passing through the thread gaps. A person who depends on sealant for strength will have problems.
Different sealants work with different pipe materials. Some sealants work with brass. Others work with steel. A person chooses a sealant rated for the pipe material and the water temperature.
The amount of sealant matters. Too little sealant leaves gaps. Too much sealant squeezes out and into the pipe. The excess sealant in the pipe restricts water flow. The person applies just enough sealant to cover the threads without filling the pipe opening.
Why Pipe Thread Tape and Pipe Dope Serve Different Purposes
Pipe thread tape and pipe dope both seal threads. The two products work differently. A person chooses one or the other based on the situation. Some people use both together.
Pipe thread tape lubricates as well as seals. The tape reduces friction during tightening. A person tightens a valve with tape more easily. The tape works well for brass and plastic fittings.
Pipe dope cures into a solid seal. The dope fills irregular gaps that tape cannot reach. Dope works well for steel and iron pipes. The dope also seals larger gaps than tape.
Tape takes less time to apply. A person wraps the tape around the threads in a few seconds. Dope takes longer to apply. The person brushes or squeezes the dope onto each thread.
Dope resists high temperatures better than tape. A person working with hot water pipes chooses dope. Tape may soften and lose its seal under heat. Dope stays solid at higher temperatures.
Choosing between tape and dope for a Threaded Stop Valve:
- Tape for brass and plastic valves
- Dope for steel and iron connections
- Tape for quick, simple installations
- Dope for high temperature or high pressure
- Both for critical installations with leak concerns
A person using tape wraps the tape in the direction of the threads. The tape should not cover the first thread. The first thread starts the connection. Tape on the first thread peels back during installation.
A person using dope applies a thin layer over all threads. The dope should not fill the pipe opening. A small amount of dope squeezed into the pipe blocks water flow. The person wipes away excess dope after tightening.
What Proper Tightening Feels Like on a Threaded Stop Valve
Tightening a valve requires feel. The person turns the valve onto the pipe. The threads engage. The valve moves freely at first. Resistance builds as the threads tighten.
The proper tightness feels firm. The valve stops turning. The person feels the metal contact between the valve and the pipe. A final quarter turn with a wrench sets the seal.
Over tightening changes the feel. The valve turns hard. The threads feel rough. The person uses force to turn the valve. The metal deforms. The deformed threads cause leaks.
Under tightening feels loose. The valve turns with little resistance. The person thinks the valve is tight. Water pressure pushes the valve open. The loose connection leaks.
The number of turns varies. A valve on a new pipe turns five to six full rotations before stopping. A valve on a used pipe with existing threads turns fewer rotations. The person counts the turns to know when the valve has reached full engagement.
Two wrenches help with tightening. One wrench holds the pipe. The other wrench turns the valve. Using two wrenches prevents the pipe from twisting inside the wall. Twisting a pipe causes hidden damage.
A person who feels unsure stops tightening and checks the seal. A small leak after installation means the valve needs another half turn. A large leak means the sealant failed and the valve should be removed and reinstalled.
How to Avoid Cross Threading During Installation
Cross threading happens when the valve goes onto the pipe at an angle. The threads do not align properly. The person forces the valve to turn. The mismatched threads cut into each other. The connection becomes crooked and weak.
The valve may seem tight, but the threads have damaged each other. Water finds a path through the damaged threads. The valve leaks. A cross threaded valve cannot be fixed. The person must remove the valve and replace it or repair the pipe threads.
Starting the valve by hand prevents cross threading. Fingers feel the thread engagement. A person turns the valve onto the pipe with fingers only. The valve should turn easily. Any resistance means the threads are not aligned. The person backs the valve off and tries again.
A crooked valve indicates cross threading. The valve sits at an angle to the pipe. The person sees the gap between the valve and the pipe on one side. A properly aligned valve sits straight. The gap between the valve and the pipe is equal on all sides.
The first thread matters most. The person aligns the valve with the pipe. The valve starts straight. The first thread engages correctly. The rest of the threads follow the same path.
Steps to avoid cross threading a Threaded Stop Valve:
- Hold the valve straight against the pipe end
- Turn the valve clockwise by hand until resistance starts
- Stop if the valve feels hard to turn by hand
- Back off and realign if the valve sits crooked
- Use a wrench only after the valve turns freely for several rotations
A person who forces a valve onto a pipe damages the pipe threads as well as the valve threads. The pipe may need a thread repair tool or a new fitting. The extra work and cost make the initial care worth the effort.
Why the Valve Position Matters for Future Access
A Threaded Stop Valve goes on a pipe in a specific orientation. The handle faces a certain direction. The outlet points toward the appliance or fixture. The person thinks about future access when choosing the position.
The handle should face outward. A person reaches the handle easily to turn the water on and off. A handle facing the wall becomes hard to reach. The person must contort to operate the valve.
The outlet needs clearance. A hose or supply line connects to the outlet. The connection requires space for the hand and the wrench. A valve installed too close to a wall or cabinet blocks access.
The valve position also affects leak detection. A person sees a leak more easily when the valve faces outward. A hidden leak continues without notice. Water damage occurs before the person finds the leak.
A person installing a Threaded Stop Valve visualizes the final location. The valve goes on the pipe. The handle turns without hitting the wall. The outlet faces the direction of the appliance. The whole installation looks planned rather than accidental.
The person also thinks about future replacement. A valve installed incorrectly may need replacement later. The next person removes the valve without damaging the pipe. The orientation makes removal easier.
What a Leak Test Tells Right After Installation
A leak test happens immediately after installation. The person turns the water on slowly. Water flows into the valve. The pressure builds. The person watches the threads for any moisture.
The test takes a few minutes. The person looks at the connection from all sides. A small bead of water appears on the threads. The person tightens the valve another half turn. The water stops.
A large leak means the sealant failed. Water sprays or drips from the threads. The person shuts off the water. The valve comes off. The threads get cleaned and new sealant applied. The valve goes back on.
The leak test should be done with the valve open. Water fills the valve body and the outlet. The pressure on the threads is at its maximum. A leak shows up quickly with the valve open.
The person also checks the outlet connection. The supply line attaches to the outlet. A leak at that connection means the supply line needs tightening or a new washer. The person tests both the valve threads and the outlet.
A dry connection after the test means success. The valve seals properly. The person turns the valve off and on a few times. The valve operates smoothly. The installation is complete.
A person who skips the leak test takes a risk. A slow leak behind a wall or under a sink causes damage over time. The test takes minutes and saves hours of repair work later.
How Water Pressure Affects a New Threaded Connection
The water pressure in the pipe pushes outward against the valve threads. The pressure tries to force the valve off the pipe. The threads hold the valve in place. The sealant stops water from escaping.
Higher pressure puts more stress on the connection. A Threaded Stop Valve in a high pressure system needs extra care. The sealant must fill the threads completely. The valve must tighten fully.
Low pressure systems seem easier to seal. The water does not push as hard. A less careful installation might hold in low pressure but fail in high pressure. The person follows the same installation steps regardless of the pressure.
Pressure changes affect the connection. Water pressure fluctuates during the day. A system that tested dry at low pressure may leak at peak pressure. The person tests the valve at normal operating pressure.
The valve itself has a pressure rating. The rating matches the system pressure. A person installing a valve checks the rating before installation. A valve with a lower rating than the system pressure will leak.
The water pressure also affects the feel of the valve. A valve installed correctly under pressure opens and closes smoothly. A valve installed with loose threads binds under pressure. The person tests the operation after the pressure stabilizes.
When to Call a Professional Instead of DIY
A Threaded Stop Valve installation seems simple. The steps are straightforward. Some situations call for a professional. A person who encounters these situations calls for help.
The pipe shows damage. The threads look worn or broken. A professional has tools to repair damaged threads. The amateur may not have the tools or the experience to fix the problem.
The working space is tight. The valve sits behind a wall or under a floor. A person cannot reach the valve easily. A professional has extension tools and flexible wrenches for tight spaces.
The water supply lacks a main shutoff. A leak during installation floods the area. A professional uses methods to stop the water without a shutoff. The amateur faces a mess and potential water damage.
The pipe material is unfamiliar. A person who has only worked with copper pipes encounters steel or plastic pipes. Each material requires a different approach. The professional knows the right technique for each material.
Situations that suggest professional help:
- Damaged or worn pipe threads
- Very tight or inaccessible workspace
- No main water shutoff available
- Unfamiliar pipe materials
- Leak after multiple DIY attempts
The cost of a professional call seems high. The cost of water damage from a failed installation is higher. A person who calls a professional gets the valve installed correctly the first time. The peace of mind makes the cost worthwhile.
The professional also handles any issues during installation. A valve that does not fit gets returned or exchanged. A leak during the test gets fixed immediately. The person does not need to learn new skills or buy new tools.
A Threaded Stop Valve serves a simple purpose. The valve stops water flow to a fixture. The installation should not leak. A person who follows the steps carefully succeeds. A person who encounters problems calls for help. The result is a dry, reliable connection that works for years.


